Tag Archives: Grand Master Tamer

Gargra

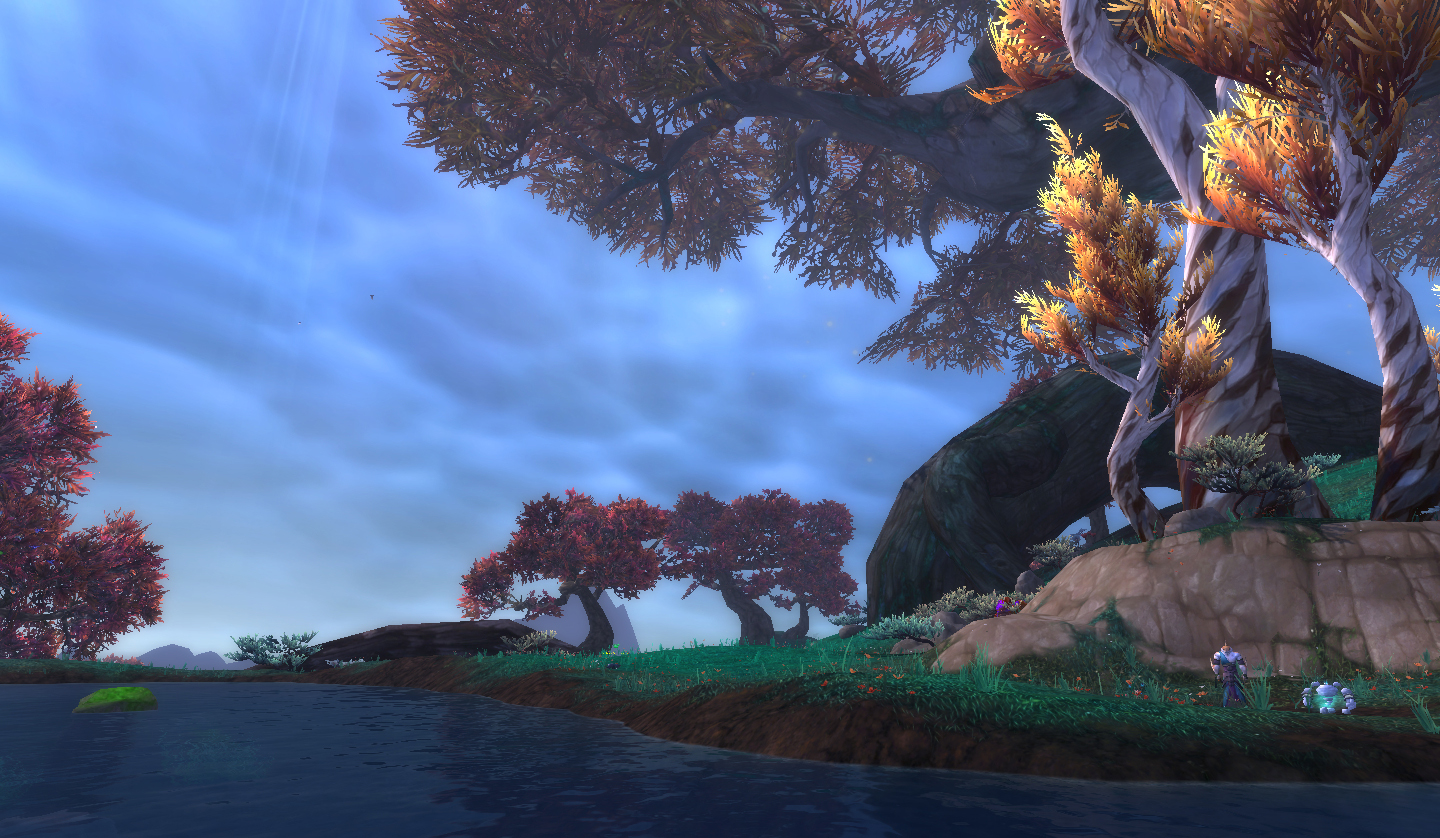
In the snowy wastes of Frostfire Ridge, you’re going to see many adorable little Frostwolf pups. While their older counterparts are seen as companions by the Frostwolf, there aren’t many people who want to snuggle these tiny balls of fluff so hard their bitty eyes pop like I do.

gargra

But, there is one Orc.

Gargra, the pet tamer in Frostfire Ridge, has 3 of the cutest pups to enter WoW to date by her side. Because I can’t get one myself until I unlock a rep and grind a ton of crystals, let’s take her down a peg, shall we?

gargrateam

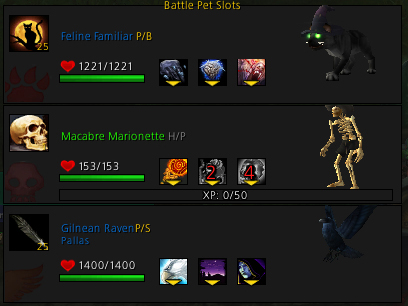
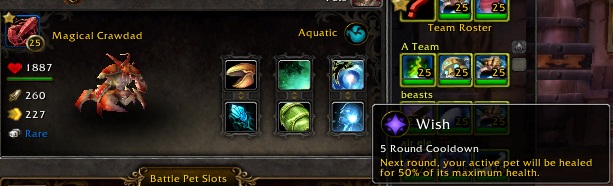
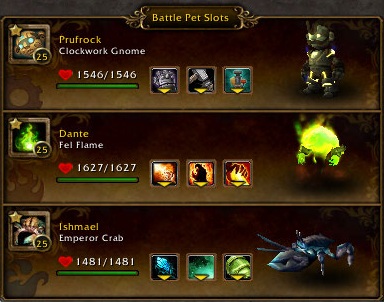
The first battle pet I’m using is a bit of a rare one. I like the Yeti specifically because it pairs Call Lightning with Ion Cannon, which is an incredibly powerful match ender. There is no other battle pet with these 2 moves, unfortunately. I’ve had success with a few other pets with Call Lightning, though you may want to use a higher-level carry here just to ensure a win. The Skywisp Moth in particular is an excellent partner here because almost all the offensive damage here is Beast, but it’s a bit dependent on RNG. If you hit Slicing Wind 1 time a lot, you’re going to be in trouble. Lil Bling has a powerful Mechanical DoT and the damage reducer Extra Plating, plus Inflation which both applies Shattered Defenses and is a strong DoT. I’m finding Lil Bling to be indispensable as we go through Draenor. I’d really suggest you grab one if at all possible. On most Auction Houses they’re under 2K gold just now, though you will have to stone & level it from scratch. An alternate is maybe the Clockwork Gnome, but the turret lacks a lot when weighed against the power of Inflation.

This specific strat is a two-pet Elekk Carry, but it can also be a level One carry.

The first of Gargra’s itty bitty frostwolves has the damage buffer Prowl, which it usually uses as a lead-in for Call The Pack. I usually try to leave in the Yeti at that point, even after I cast Call Lightning, and then swap to Lil Bling after Call The Pack. If I’m using a higher level carry pet or for the Elekk Carry I’ll sometimes try to soak this damage since it’s a pretty big hit but in any case, after that Prowl turn it’s Lil Bling’s turn to enter.

makeitrain

The interaction between Call Lightning and Lil Bling’s Inflation is our workhorse this fight. Inflation does several hits, meaning that Call Lightning’s sort-of DoT hits many times, but then after Shattered Defenses is applied each hit of Call Lightning will also double. It’s pretty sweet, and will make this fight pretty trivial. Except for one thing.

Gargra’s second wolf, Fangra, is an evasion machine.

fangradodge

She’ll boost everyone’s speed with Dazzling Dance & then immediately use Dodge to avoid your attacks for 2 turns, meaning that, if you use your Inflation through it, Shattered Defenses will fall off before you can attack her again. You should use these turns on Extra Plating & re-applying the Make It Rain DoT.

The very first thing Gargra’s last frostwolf pup does is cast Howl. Because of the huge damage the target battle pet will take henceforth, and the fact that Howl deals zero damage, this is the turn we’re going to put the carry pet into the fight, then swap it back out before the next turn. If we don’t, well, this:

gargrabighits

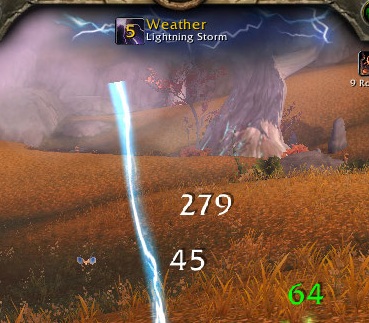
Even if you’re not carrying a pet, you want to swap whatever pet took Shattered Defenses out if at all possible. Luckily at this point, if you’re using the Yeti the fight is a lock. Ion Cannon will absolutely destroy that last pet, though to make sure it’s a lock, you’ll want to make sure that last pet is within 900 HP or so. I usually sneak in one last Call Lightning here & then, bam.

tranquilmechyeti

If you’re using a different pet you obviously need to be a lot less careless than that, plan your moves & avoids & whatnot, but dang those big numbers are just so, so pretty aren’t they.

Seeker Zusshi

zusshi pet battle tamer wow world of warcraft

This last tamer in Pandaria is a unique one, and not just because he’s the only Jinyu tamer. He’s also quite useful for carries, because of one really specific trick & combo. I’ll also give you tips on beating him with other teams, but you can carry a level one on this fight with a specific team. Here it is:

zusshiteam wow world of warcraft pet battle

The Anubisath Idol is fairly indispensable here because of his Sandstorm/Deflection combo. To carry a level 1 Sandstorm is really key, but if you’re going for level 10 or higher carries, or just beating the encounter the first time around, most pets with a decent heal will work pretty well in the first slot. My trusty crab Ishmael is of course a good pick, but I’ve also used frogs and my Perky Pug Bertha for this too. The carry pet is in the middle slot, and the anchor is a Flying battle pet, preferably with some kind of avoidance move. Moths with Cocoon and fliers with Lift-Off work really well, but another option is to go glass cannon, with something like a Gilnean Raven.

zusshiblock wow world of warcraft pet battle

First up is Diamond, and he’s the reason we’re packing the Anubisath. He uses Howling Blast, which does an AOE on all your pets as long as your front battle pet is Chilled. This is why Sandstorm is key if you’re trying to carry a level 1 battle pet. Occasionally my back row will take 10-20 damage if there’s an elemental-weak Mechanical, but other than that Sandstorm will block all damage from that AoE. After you’ve sorted that, Diamond just needs to be burned down.

zusshi dive wow world of warcraft pet battle

Mollus is a Rapana Whelk with the Acidic Goo/Dive combo we’ve seen before, and Absorb. The thing here is that Absorb’s reflexive heal will make the battle drag on a bit while Dive makes for big damage, which is why I highly recommended either a pet with a heal or a big dodge in this slot. To be clear, because of the mechanics of Dive, an ability with a similar mechanic will only result in your battle pet taking damage. Avoid that Dive when you can and get those hits in otherwise and you’ll dispatch Mollus handily.

zusshimoth wow world of warcraft pet battle

Skimmer always leads off with the same combo, and this is why you can carry a level 1 pet. He’ll self-heal and apply weather, then use Soothe, and then charge his Pump before releasing it on his fourth turn. Because Pump is the only offense he has, and he dawdles before actually unleashing it, this makes his offense both easy to counter and easy to use for a level 1 carry. I usually swap my leveling pet in as soon as Mollus dies, regardless of whether my first pet is healthy, active, whatever, to take advantage of this first downtime, because after the first go around it gets a bit less predictable with the various ability cooldowns. From there, just try to avoid Pump when you can and burn Skimmer down.

It has been quite a journey, through all the daily Tamer pet battles in Pandaria, so it’s fitting we end in the ever-glowing twilight of the Townlong Steppes. From here, it’s almost possible to forget that we, the players, in our travels through Pandaria, ruined Hyuna’s view, that we had a hand in polluting Moruk’s water, and that the vegetables surrounding Nishi will no longer grow enough to feed the Heartland so all the farmers will starve.

zusshi2 wow world of warcraft pet battle tamer

Just don’t tell Zusshi he’s one of a handful of Jinyu left. It’s extremely likely that all his friends & family are dead.

Um, to Draenor?

(edit) – This strategy works perfectly well as an Elekk Carry for your Awfully Big Adventure too.

Hyuna Of The Shrines

6.0 Update: This strategy is still fully functional for level 1 carries against Hyuna. It’s also now functional for an Elekk Carry as a step in the achievement An Awfully Big Adventure.

hyuna1

Depending on your journey through Pandaria, this is either one of the most idyllic pet battles around, or one of the most depressing, making it an absolute must to complete before we continue on to unbroken Draenor.

hyuna2

Well, some of the ‘must do’ status is also because you can carry a level 1 pet here, but that’s so much less poetic.

hyunateam

The Feline Familiar is, as addressed on the blog before, a very unique battle pet. I like using mine here because of the magic damage against Hyuna’s first battle pet Skyshaper, a Flyer. As long as you use a pet with Stoneskin or something like it (even Sandstorm) you’re good to go. I really like using my Emerald Whelpling with Emerald Presence here, and that may be a better choice, but it’s a bit less attainable than the Feline so I chose to highlight the latter. I’ve even used my Emperor Crab in this carry strategy successfully, even though he takes extra damage from everything Skyshaper dishes out. I’d recommend staying away from the aquatics in general though.

The Gilnean Raven can be swapped with many different flying pets too, but the anti-healing effect of Darkness combined with the Raven’s strong offense makes her my #1 pick here. Lastly, the placement of the pets is important, as we’ll be sending in that level 1 Marionette late in the match.

hyunacat

The reason for the shield ability is clear fairly quickly. All of Skyshaper’s abilities are small hits, and it’s also packing DoTs. As long as you keep that shield up you’ll make it through no problem.

Fangor is a fairly standard snake, and you should make it through at least half of his life with your first pet. He’ll Burrow early on though. If you’re having trouble and just want the bag, I’d recommend a mechanical here, with a but. You’ll be able to summarily mow down this snake with say, a Clockwork Gnome, but the fight really starts once you get to Dor the Wall so you need to choose your moves carefully.

Dor has a big heal and uses a Shell Shield of his own. The very first time I did this fight, I blasted through the first two pets in under 10 turns, but the entire fight lasted over 150. I was using my usual anchor, the Emperor Crab, with his own heals and Shell Shield.

hyunadead

The heal is why the Gilnean Raven, with its Call Darkness heal counter, shines here. Because of the shield, you’ll want to stay away from multi-hits, like Moth Balls, in favor of large ones, like Moth Dust.

hyunacarry

Dor’s 3rd ability, his only offensive one, is Headbutt, which is where that level 1 carry comes in. Headbutt is on a 4-round cooldown, so once he performs it the first time, you have 3 rounds to swap in that level 1 pet with no risk. With a Safari hat, he’ll be level 11 after you win.

Hopefully in far fewer than 150 rounds.

Mo’ruk

Update for 6.0: This strategy still works. However, due to a few other changes, in the interest of a strategy that’s not prohibitively rare, I definitely recommend the crab over the crawdad. If you’re here with your Elekk Plushie on your Awfully Big Adventure, this strategy will work swimmingly.

—–

moruk

This guy was one of my toughest opponents as I was working my way through the tamers in Pandaria. However, he’s one of the more conveniently located tamers, right next to the Anglers Village in Krasarang if you’re into that kind of thing, so I try to stomp on him on a regular basis.

This fight is very gimmicky and your success or failure depends really heavily on how often you get stunned, or slept, or whatever else. Both Mo’ruk’s final 2 pets use these abilities. This strategy gives you a very high chance of success, but I’d say once a week or so I have to heal everybody and try again.

morukteam

The crawdad is particularly healing-motivated, and the emerald whelpling is particularly geared toward magic DPS and a bit of healing. This fight is quite RNG dependent, but these 2 pets mitigate the R in RNG quite a lot. I’d suggest trying a Spawn of Onyxia or another high dps dragon in Emilia’s slot. I’ve used an Infinite Whelpling with decent success too. I frequently have decent luck with my Emperor Crab tank in the Crawdad slot. Your leveling pet has to be able to take roughly 400 damage at minimum.

The leveling pet goes in first, as a soak. Moruk’s Woodcarver is a Beast and the first ability, Acidic Goo, is a DoT which increases your damage taken.

acidicgoo

Since Woodcarver’s 2nd ability is always the hard-hitting Burrow, it’s a good idea for your first pet to grab that buff before you swap in your Crawdad. This is a fairly straightforward fight. He’ll use Burrow, and Acidic Goo when he can. He also uses the Consume ability to occasionally heal himself.

consume

If at all possible, try to make it so that you’re at high health and have your Renewing Mists rolling when you kill Woodcarver. When he dies, you have to IMMEDIATELY swap to your dragon. Don’t even try to get cute and cast Wish. This is where the RNG battle begins.

lightstalker

Lightstalker‘s first hit is fairly hard, even with the Dragon’s strong defense against Flying abilities. It also has a 25% chance to sleep you. This is why we swapped out the Crawdad ASAP… he’s aquatic, so he takes so much damage just from that first hit, plus the fact that you’re going to be slower, so you may just get stunned for the effort. Lightstalker also has the Moth Balls ability, which will slow you, and he combines that with Alpha Strike, which does more damage if he’s faster than you. He’s a bit of a glass cannon, is what I’m saying.

The goal here is to burn the moth down as quickly as you possibly, possibly can. This is why I went with the Emerald Whelpling with that specific moveset. Magic damage ahoy. If the moth manages to kill your Dragonkin with RNG, you’re quite likely screwed.

stunned

The last pet, Needleback, has a few interesting moves. He has the speed increasing small nuke Powerball, which means after a turn or two you aren’t going first anymore. He also has Grasp, which does minimal damage but prevents swaps. And then there’s Headbutt, which does a lot of damage and has a chance to stun you. Yeeeah.

This is why my #1 choice to finish it out is the crawdad. Needleback inevitably uses the Headbutt ability when it’s off cooldown, so the turn before it comes up I can use Wish if I need to, to make sure I don’t die if I get stunned. The crab is a solid choice too, but he doesn’t have that extra failsafe the (expensive, hard to get) Crawdad does.

crawdad2

Most of the time with this team and strategy, I win. Every so often the RNG stars align to hand me a loss. If this is your first time going after this tamer, try sticking the crawdad or a crab in the first slot to soak that first Acidic Goo, then swap in a mechanical to kill the beast.

I’d feel worse about calling Mo’ruk a fight-cheesing jerk, but it’s hard to feel bad for someone who lives on a freaking beach, okay?

morukbeach

Grand Master Tamer Aki

9/25/2014: This fight is now up to date for Warlords of Draenor. For an elekk carry, use your elekk the same way you would for a level 1 carry.

aki

Another frustrating fight, but Aki The Chosen can be a candidate for powerleveling your pets if you have the right strategy.

I was impressed by how well-balanced this fight is for tamers working their way up the ranks. Unlike some of the other tamers at lower levels, there are several different choices you can make for this Tamer. I’ve used a couple different group makeups, but this is the one I’ve settled on for now as the most reliable for me.

akivsteam

The first pet I chose for this screenshot was kind of a fluke, because I was trying to finish off my leveling achievements at this time. In your first slot, you can choose a level 1, as long as it isn’t Undead. My emperor crab Ishmael is my choice for lead battler, yet again. This time, make sure he picks Snap, since one of Aki’s pets is a critter. Your main requirement for a tank in this fight is that they must have some kind of blocking effect, like Shell Shield. This is one of the two keys for success in this fight. Snails are a decent choice too, but Whiskers can get a little bit dicey because the whelk’s undead absorb ability is so crummy against the aquatic otter. The Scourged Whelp is a very sturdy multi-hitter, and can be replaced by a number of other multi-hitters.

Aki’s first pet is critter cricket Chirrup with 2 heals and the critter ability Swarm, which does several tiny hits in one turn. Because those hits *are* tiny, most level 1 pets can live through one round of it, but it’s a little bit close, and the Undead family weaknesses against Critter damage make them right out. I like to err toward the side of level 3+ personally, but if your pet dies you can just forfeit and re-try with a different level 1 immediately, as all your other battle pets are at full health. After the first round carry swaps out, Ishmael puts up Shell Shield and makes quick work of Chirrup. Make sure to keep that up though, because if you get anything other than a block, miss, dodge, etc, you’ll get hit with a debuff that increases your damage taken by 100%. I don’t think Spiked Skin‘s mitigation is quite enough to reliably avoid getting that debuff. This debuff is very bad for the next pet in Aki’s arsenal.

aki2

I leave Ishmael up front with his shell until Aki’s next pet Stormlash the dragonkin casts Call Lightning to absorb the initial hit. This hit is ~400 without the previously mentioned modifier, but upwards of 800 with it, so that extra hit really needs to be avoided. Then, when the weather changes to Lightning Storm, things. get. real.

Lightning Storm increases the damage done by mechanical pets, and also adds 40-50 damage to every separate hit. Sometimes I choose my clockwork gnome because of the boost to mechanical abilities, but I frequently get so excited by the complete annihilation he visits on Stormlash’s head that I forget to heal in a timely fashion. My Scourged Whelpling Radley has better survivability, because I can cast his plagued blood ability, which allows you to heal on each hit (but doesn’t work for the additional hit, FYI). I also choose death and decay because it’s a DoT and tail sweep because Radley is slower than Stormlash so I always get the second hit. Now, I do 150 additional damage because of the storm, and heal for 150 per turn because of plagued blood. It is pure carnage. Simply delightful.

lightningstorm

Because Stormlash is a dragonkin, he takes less damage from flying attacks so you should stay away from pets like Shrine Flies. An elemental pet with dots is a good pick too, since they aren’t affected by weather. As a result they don’t take the extra damage, but they do deal it. There are a lot room for preference and experimentation here.

Once I finish Stormlash, I continue with Radley while Lightning Storm persists, and then switch back to Ishmael to finish up. Keep up with your healing and mitigation abilities, though… Whiskers has several mitigation abilities, so he can slowly whittle you down with Surge while casting Survival and Dive.

On a different day, I did this with a level 15 pet, Safari Hat on, and this was my result:

akixp

Because she’s a short jaunt from both home cities in Pandaria, she’s really worth beating every day. If you have a different preferred lineup, feel free to discuss it in the comments!

akiwin

Pet Powerleveling And You

I’ve made reference in the past to powerleveling strategy. I’m making this post to outline exactly what that is, because it’s a handy skill to have. This technique is commonly known as a Carry.

Our victim for this post will be Grand Master Tamer Trixxy.

trixxy

Aw, don’t look so sad, Trixxy.

This strategy is applicable for pretty much any tamer or even for wild pet battles. The lineup will vary, and a lot for some of the later tamers in Pandaria, which need specific combinations in order for this to work. But for right now, I’m going with this lineup:

powerlevel

Stella the Celestial Dragon is a good pick for this basic fight because of her group heal, and because she matches the whole blue vibe Trixxy’s got going. Ishmael is just there in case I get into bigtime trouble, and is also blue. These choices don’t really matter, as nearly any team of 2 level 25 battle pets will be able to dispatch Trixxy fairly handily. And I chose the unnamed Tonk because I just bought him at the Faire like 5 minutes ago. Yes, really. That tonk really screws the whole color trend though. For shame, tonk.

Basically, Blizzard made it so that level 25 battle pets don’t soak any XP. As long as your pet to be carried survives through 1 round of pummelling in the front row, you can send it to the back row, and as long as there aren’t any aoe abilities to wreck its face your carried pet will get as much XP as if it miraculously killed all 3 of the other pets by itself. All you need is 2 level 25 pets who can kill the other pets without a third. This also works for higher pets.

This can get very sketchy in the later battles, but with Trixxy once you have any level 25, even an off-breed, you’ll be able to solo her. And then you wear a handy Safari Hat, your level 1 pet will gain

xpgain

1898XP and 8 levels. In one fight. Yeah.

Even if your pet isn’t level 1, as long as it’s more than 2 or 3 levels lower than Trixxy’s level 19s, you’ll gain boatloads of XP without much effort at all. This may be more valuable than the contents of the bag you get from doing her daily. I make a point of doing her, Lydia Accoste in Deadwind Pass, Bloodknight Antari in Shadowmoon Valley and Farmer Nishi in Valley Of The Four Winds every day for just this reason. I do others too but these 4 are sure things with nearly any level 25 pet, and very quick fights. They also grant far more XP than if I were to battle a wild pet of the same level… Farmer Nishi is especially notable, since she’s worth a whopping 2-4000 XP depending on the level of your pet, though you may need to go slightly higher level than 1 for your soak pet, since one of her pets will use an AOE on occasion.

Jeremy Feasel

Update for 6.0: This strategy still works really well for a two-pet carry strategy. To complete this leg of the quest An Awfully Big Adventure, this same strategy can be employed, though it may be a good idea to try & absorb a few more of Fezwick’s hits with your Elekk Plushie to ensure a victory.

—–

Jeremy Feasel at the Darkmoon Faire is a difficult fight to be sure. But how can someone so cordial be so annoying?

jeremyfeasel

Look, he’s even waving. How nice of him. Well, his annoying nature is in no small part because of his damnable monkey Fezwick.

darkmoonmonkey

Annoying little Beast. His mechanical tonk, Honky-Tonk can be problematic too, but the tonk doesn’t wear a hat like he’s people. The third in his team, a magical darkmoon eye named Judgement, is the reason we come to the Faire to demolish some pets… the eye is only obtainable from the bag Feasel gives as a daily reward for beating him, and that’s really the only thing in those bags worth obtaining. But, you know, thanks for the grooming kit, Jeremy.

This is the lineup I typically use:

team

Eagle-eyed observers will note that this is virtually identical to the Major Payne lineup. Well, that’s because it’s the same screenshot and I’m reusing it. For Jeremy though, I usually lead off with my Fel Flame. Dante can typically lay out the first two pets Payne sends at him, as long as he leads with his most damaging DoT (Dragonkin for the Eye and Elemental for the Tonk) and the immediately uses Conflagrate.

Conflagrate typically eats up at least half of Judgement’s health pool and more than that for the elemental-vulnerable Honky-Tonk as long as they’re burning while I use it (hence, dotting up first). Because it’s 2 hits, it doesn’t trigger the magic pet type bonus, where they can’t be dealt more than 40% of their health in one hit, either. After that, I do the less effective DoT, then continue using the strong one until the pet dies. By then, conflag is usually off cooldowns and can be used again once I make sure the new pet is burning.

Feasel will always lead with these 2 pets and then use Fezwick as the anchor. Usually, Dante can take out both these pets on his own no problem, but if he dies before the second one is down, my clockwork gnome Prufrock can step in to finish things off before he has to take on Fezwick.

vsfezwick

Prufrock’s mechanical attacks are strong against Fezwick. The real enemy with Fezwick is RNG. If you get stunned a lot, you may be screwed, which is why I keep Ishmael as my strong defense anchor. Sometimes all I can muster with Prufrock is a turret before Fezwick uses a combo of his quicker speed, stuns (which can break the gnome’s Repair ability) and high damage strikes to burn him down. As a result, if you’d like to use this strategy to powerlevel I’d definitely recommend you use something a bit higher level with a bit of defensive power, or just be prepared to burn some tokens.

Major Payne

This guy, right here. UGH.

payne

Look at that mustache. What is he, an old-timey strongman hipster?

He was the second fight I had to sort of ‘gear up’ for, and is one of the few for which I don’t yet have a 2-pet powerlevel strategy. However, out of sheer spite, because I hate his STUPID FACE and want as many people as possible to fart in it, here are some strategies I’ve used to beat him.

His 3 pets are the mechanical Beakmaster, beast Grizzle, and elemental Bloom. The elemental is always last in his lineup, but whether Grizzle or Beakmaster goes first can vary. There are two ways you can go about beating him. The first is to pick pets which defend against his pet’s attacks, like this:

payneteam2

Flying defends against beastly Grizzle, elemental defends against mechanical Beakmaster, and critter defends against elemental Bloom. In my experience this is a slightly less reliable setup. In particular, my Nether Ray Icarus has trouble burning down Grizzle quickly enough. Grizzle deals a lot of damage, and also has a really big multi-round heal ability so he can be very difficult to counter. Fel Flame Dante really shines as a glass cannon here, and can pick up some slack. Between her heal and burrow ability to counter Bloom’s multi-round abilities, Perky Pug Bertha had no trouble holding her own.

There are 2 real issues with this strat. Against his pet lineup you need to burn down his pets very quickly, and picking based on defense doesn’t really help that cause. The other is that abilities within pet families can vary pretty widely. This strat gets a lot less doable if you replace the Fel Flame with an elemental with off-class abilities, like the Ashstone Core, for instance.

The other strategy is one I call the glass cannon: Pick pets which have abilities that are strong against beast, mechanical and elemental.

team

The point of this strategy is to kill them before they kill you. My Clockwork Gnome typically kills Grizzle before he’s any trouble, and then it’s smooth sailing through the rest. A Fluxfire Feline might be a better pick here, because of their burst DPS, but I haven’t found a mechanical upgrade stone or a rare yet so I can’t personally vouch for that. You’ll notice that Dante shows up again to pummel Beakmaster… he is particularly suited for this battle. A Phoenix Hatchling or Dark Phoenix Hatchling are also good choices. My beloved little crab is very hearty, so he’s usually my pick when I need to deal aquatic damage.

A combination of these strategies would have first up against Grizzle a pet in the Flying family with mechanical abilities. I haven’t found any of these thus far. As implied above, the elemental family is both a strong attacker and defender against mechanical pets, so many elemental pets are excellent choices. For Bloom, a critter with some Aquatic abilities would be a good alternative. Namely, a snail or the Rapana Whelk. The dive ability is a good counter to Bloom’s roots too.

Good luck, and please make this jerk eat dirt. For me.

paynesad